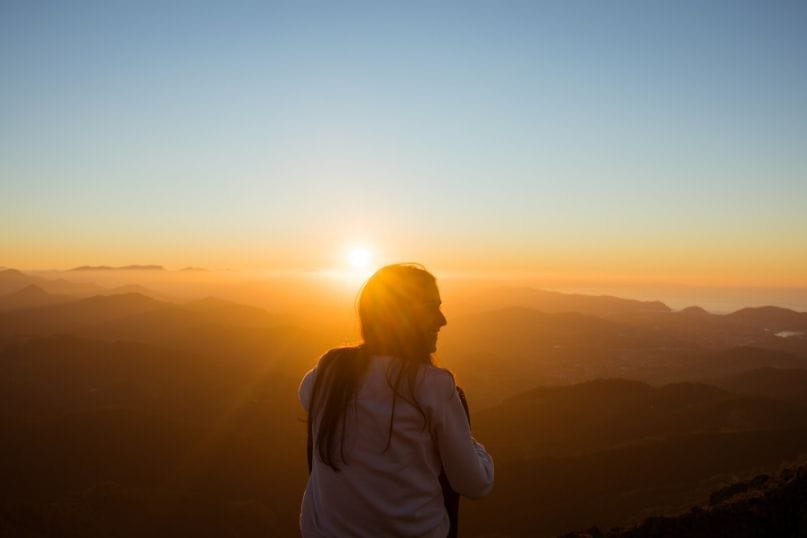
Ah, the golden hour. You’ve probably heard many photographers speak ad nauseum about this particular time of day – and for good reason! The golden hour fills the world with a glow – giving us the perfect light for both flattering portraits and breathtaking landscapes.
Happening during the hours right before sunrise and right before sunset, the sun sits low in the sky allowing you to get soft light and none of those noontime harsh shadows. This elusive hour can be tricky to photograph – here are some tips on how to shoot it perfectly.

Get the timing right!
The golden hour depends on three things: where you live, what season it is, and what the weather is like. There are some golden hour calculators online, but you can always just check your local sunrise and sunset times. Typically, it’s one hour after sunrise and an hour before sunset.
That means you want to be at your location already set up. It’s also helpful to go to the location you want to shoot a few days beforehand – you can get an actual look at what the golden hour does in that area.
Also, if conditions are cloudy, your golden hour results may not be what you’re looking for – sometimes clouds can completely block your view and sometimes they can enhance a sunrise or sunset.

Focus on aperture, ISO, and white balance.
If you’re shooting portraits in the golden hour, keep a wide aperture, like f/5.6 or wider! Also, if you’re new to photography, there’s nothing wrong with switching on the Aperture Priority setting on your camera as that can help you see what aperture looks best. For ISO, increase it as the sun goes down.
Don’t forget to mind your white balance! If your camera is set to auto white balance, you may end up with images that look more blue instead of that nice golden tone. Again, if you’re a beginner, try setting your white balance to shade/cloudy.

Know the types of light you’re working with.
With the golden hour, you’ll find four types of lighting to work with: backlighting, frontlighting, rim lighting, and flare.
- Backlighting: Typically featuring a hazy appearance, backlighting is achieved when your subject poses with their back to the sun. Is your subject looking too dark? Try increasing your exposure or filling your subject with a reflector.
- Frontlighting: As the opposite of backlighting, you get frontlighting when your subject faces the sun. This is the lighting that gives portraits that wonderfully warm and flattering tone. All you have to do is make sure the sun is at your back!
- Rim lighting: Similar to backlighting, rim lighting happens when you get a faint glow around your subject. To get this, it’s best to focus on something like a person’s hair or the edges of flower petals.
- Flare: You get flare when the sunlight hits the front of your lens. Try playing with different angles – flares are particularly cool when they are partially obscured by your subject.
Keep an eye on your settings.
The light is constantly changing during the golden hour. Keep an eye on your settings as you’ll need to make changes as the light fades. This means you may need to increase your ISO, widen the aperture, or lower the shutter speed.

Stick around for the blue hour.
If you’re out shooting the golden hour around sunset, stick around once the sun sets for the “blue hour” – an even briefer time period in which the world is filled with a blue hue. Experiment with some shots here!
What are your golden hour shooting tips? Let us know in the comments! Ready to get printing? The dramatic colors of the golden hour are perfect for printing on Metal.