


How to Design and Order
a Photo Book
a Photo Book
It’s that time. You’ve gathered your precious memories, and now you’re ready to immortalize them in our heirloom Photo Book. We know it
might seem like a daunting task to know exactly where to start, but we’ve got your back.
might seem like a daunting task to know exactly where to start, but we’ve got your back.
Here’s our comprehensive guide to building your Photo Book — from choosing your photos and designing it to reflect your own style, to all your
add-on options and ordering!
add-on options and ordering!
How to Design and Order a Photo Book
It’s that time. You’ve gathered your precious memories, and now you’re ready to immortalize them in our heirloom Photo Book. We know it might seem like a daunting task to know exactly where to start, but we’ve got your back.
Here’s our comprehensive guide to building your Photo Book — from choosing your photos and designing it to reflect your own style, to all your add-on options and ordering!
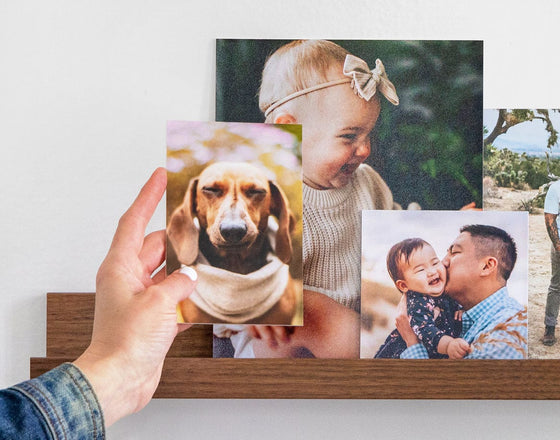
1. Select the photos you’d like to put in your Photo Book.
If you’ve got photos ready to go for a Photo Book, the odds are good that they are for a specific reason or occasion. Whether it’s a Wedding Guest Book for your upcoming nuptials, a Wedding Photo Book from your recent nuptials, Grad Photo Book for your recent grad, or a Family Photo Book to savor your family’s favorite moments from the past year, you likely have dozens and dozens of beautiful photos to choose from. Choosing your favorites may be a difficult task to take on by yourself! Recruit friends and loved ones to help you make the decisions.
To get started, you can check out Photo Book inspiration on the NPL blog!.
Keep in mind: When designing your Photo Book, we recommend using high resolution image files. Check out our pixel chart for more information about uploading print-ready photos.
To get started, you can check out Photo Book inspiration on the NPL blog!.
Keep in mind: When designing your Photo Book, we recommend using high resolution image files. Check out our pixel chart for more information about uploading print-ready photos.
1. Select the photos you’d like to put in your Photo Album.
If you’re choosing an Album99 for your photos, it’s likely you already have a specific occasion in mind for your album. Whether it’s a Wedding Album from your recent nuptials or Senior Album for your recent grad, you likely have dozens and dozens of beautiful photos to choose from. Choosing your favorites may be a difficult task to take on by yourself! Recruit friends and loved ones to help you make the decisions.
If you’re creating a Wedding Album and having trouble choosing from the myriad of photos from your magical day, check out our tips on choosing photos for your Wedding Album.
Keep in mind: When designing your Photo Album, we recommend using high resolution image files. Check out our pixel chart for more information about uploading print-ready photos.
2. Prepare your files for print.
Now that you’ve selected the photos you’d like, we highly suggest preparing your files for print to make for a seamless ordering process. If you don’t regularly work with photos on a professional level, we know some of this info might be a lot to take in. But don’t worry — you don’t have to check all of these boxes! Think of this more of a helpful guide to guarantee the best results when your photo product is printed.
A lot of the time your photos will be saved on your device with most of these characteristics. To check, you can typically find this info when you click an “info” icon on your phone or “get info” on your computer.
A lot of the time your photos will be saved on your device with most of these characteristics. To check, you can typically find this info when you click an “info” icon on your phone or “get info” on your computer.
Format your files like this:
(If any of these terms are unfamiliar, see below for a description!)
• .jpg, .png, or flattened .tiff files (.tiff files must not be layered)
Currently, .tiff files can only be uploaded in ROES (a downloadable software for your computer, which we will discuss below)
Please note, if you are having issues uploading your file, try saving your photos as .jpg or convert to.jpg using a free online converter.
• 125 dpi minimum resolution - 300 dpi maximum resolution
• 8-bit color depth (see description below if you're unfamiliar)
• sRGB IEC61966-2.1 color profile/space
• RGB color mode (CMYK not accepted)
• 25 character filename limit — *NO special characters, excluding hyphen (-) and underscore (_)*
Things to note: If uploading to a gallery on our website, each file cannot exceed 40 MB. If uploading into our desktop ROES system, there is no file size limit.
2. Prepare your files for print.
Now that you’ve selected the photos you’d like, preparing your files for print is a crucial step for a seamless ordering process.
Format your files correctly.
.jpg, .png, or flattened .tiff files (.tiff files must not be layered)
Currently, .tiff files can only be uploaded in ROES (a downloadable software for your computer, which we will discuss below)
iPhone mobile devices save photos you take in a HEIC format. This file type cannot be uploaded, so you will want to convert the file to .jpg before attempting to upload. You can do that easily through websites like https://heic.online/. You can also change the format of how your files are saved for future photos within your Camera app's setting! Click here for instructions.
Please note, if you are having issues uploading your file, try saving your photos as .jpg or convert to.jpg using a free online converter.
125 dpi minimum resolution - 300 dpi maximum resolution
8-bit color depth
sRGB IEC61966-2.1 color profile/space
RGB color mode (CMYK not accepted)
25 character filename limit — *NO special characters, excluding hyphen (-) and underscore (_)*
Things to note: If uploading to a gallery on our website, each file cannot exceed 40 MB. If uploading into our desktop ROES system, there is no file size limit.
Some terminology to know:
.jpg = Joint Photographic Experts Group
.tiff = Joint Photographic Experts Group
.png = Portable Network Graphics
HEIC = High-Efficiency Image File
sRGB = Standard Red Green Blue
RGB = Red Green Blue
CMYK = Cyan Magenta Yellow Black
DPI = Dots per Inch
PPI = Pixels per Inch
8-bit color depth = A bit references the amount of tonal variation in an image. With the RGB color mode, the image would contain 256 tonal variations each for red, green, and blue. You are able to save your image files in different color depths however, we highly recommend submitting your files in the 8-bit color depth as this is the optimal depth for our printers
Color Correction
Have you ever ordered a photo print or photo book that ended up having entirely different colors than what you saw on your screen? That’s why we offer Color Correction for free on our Photo Books. Color Correction is a service that aims to achieve the most accurate colors for your photos, and our team of real humans work behind the scenes to make sure the colors of your photos are represented accurately in the prints.
We guarantee your 100% satisfaction for orders submitted with Color Corrections, so if you are not amazed, please let us know and we will readjust your images with any additional desired edits and reprint at no cost to you!
We guarantee your 100% satisfaction for orders submitted with Color Corrections, so if you are not amazed, please let us know and we will readjust your images with any additional desired edits and reprint at no cost to you!
If you’re editing your own photos or are a professional, here are a couple things to know.
Monitoring Calibration/ICC Profiles
ICC Profiles (ICC = International Color Consortium) help ensure the output (Photo Prints) matches the input (a computer monitor). They help professional photographers achieve the correct color reproduction when images are transferred from a camera to a monitor, and from a monitor to a printer.
At Nations Photo Lab, we generate all of our color profiles in-house and provide them to clients with top-of-the-line calibration equipment. These profiles are customized to each paper and printer they are profiled for and because of this exacting attention to detail, these color profiles are much more accurate than those generated by a third party.
If you are a professional with a calibrated monitor and have a calibration software like x-rite or Spyder, you have the option to soft proof your images using our ICC profiles! If you do soft proof using our ICC profiles, Color Correction does not need to be applied to your order.
Color Space
A "color space" is a useful conceptual tool for understanding the color capabilities of a particular device or digital file. When trying to reproduce color on another device, color spaces can show whether you will be able to retain shadow/highlight detail, color saturation, and by how much either will be compromised.
The most popular color spaces used for editing are sRGB IEC61966-2.1, ProPhoto RGB and Adobe RGB 1998. We support sRGB IEC61966-2.1.
What happens if you upload in a color space other than sRGB IEC61966-2.1, you may be wondering?
If the file is converted to ProPhoto or Adobe 1998 and it hits our server, it will get converted to sRGB IEC61966-2.1 without issue or a warning. When a file had been assigned the wrong color space and it has not been converted to sRGB IEC61966-2.1, you will start to see discoloration. When an image is in the wrong color space they often appear muted, dark, and sometimes with a green hue.
Read more about Color Space in our help article.
Color Correction
Have you ever ordered a photo print or photo album that ended up having entirely different colors than what you saw on your screen? That’s why we offer Color Correction for free on our Photo Books. Color Correction is a service that aims to achieve the most accurate colors for your photos, and our team of real professionals work behind the scenes to make sure the colors of your photos are represented accurately in the prints.
We guarantee your 100% satisfaction for orders submitted with Color Corrections, so if you are not amazed, please let us know and we will readjust your images with any additional desired edits and reprint at no cost to you!
We guarantee your 100% satisfaction for orders submitted with Color Corrections, so if you are not amazed, please let us know and we will readjust your images with any additional desired edits and reprint at no cost to you!
If you’re editing your own photos or are a professional, here are a couple things to know.
Monitoring Calibration/ICC Profiles
ICC Profiles (ICC = International Color Consortium) help ensure the output (Photo Prints) matches the input (a computer monitor). They help professional photographers achieve the correct color reproduction when images are transferred from a camera to a monitor, and from a monitor to a printer.
At Nations Photo Lab, we generate all of our color profiles in-house and provide them to clients with top-of-the-line calibration equipment. These profiles are customized to each paper and printer they are profiled for and because of this exacting attention to detail, these color profiles are much more accurate than those generated by a third party.
If you are a professional with a calibrated monitor and have a calibration software like x-rite or Spyder, you have the option to soft proof your images using our ICC profiles! If you do soft proof using our ICC profiles, Color Correction does not need to be applied to your order.
At Nations Photo Lab, we generate all of our color profiles in-house and provide them to clients with top-of-the-line calibration equipment. These profiles are customized to each paper and printer they are profiled for and because of this exacting attention to detail, these color profiles are much more accurate than those generated by a third party.
If you are a professional with a calibrated monitor and have a calibration software like x-rite or Spyder, you have the option to soft proof your images using our ICC profiles! If you do soft proof using our ICC profiles, Color Correction does not need to be applied to your order.
Color Space
A "color space" is a useful conceptual tool for understanding the color capabilities of a particular device or digital file. When trying to reproduce color on another device, color spaces can show whether you will be able to retain shadow/highlight detail, color saturation, and by how much either will be compromised.
The most popular color spaces used for editing are sRGB IEC61966-2.1, ProPhoto RGB and Adobe RGB 1998. We support sRGB IEC61966-2.1.
What happens if you upload in a color space other than sRGB IEC61966-2.1, you may be wondering?
If the file is converted to ProPhoto or Adobe 1998 and it hits our server, it will get converted to sRGB IEC61966-2.1 without issue or a warning. When a file had been assigned the wrong color space and it has not been converted to sRGB IEC61966-2.1, you will start to see discoloration. When an image is in the wrong color space they often appear muted, dark, and sometimes with a green hue.
Read more about Color Space in our help article.
The most popular color spaces used for editing are sRGB IEC61966-2.1, ProPhoto RGB and Adobe RGB 1998. We support sRGB IEC61966-2.1.
What happens if you upload in a color space other than sRGB IEC61966-2.1, you may be wondering?
If the file is converted to ProPhoto or Adobe 1998 and it hits our server, it will get converted to sRGB IEC61966-2.1 without issue or a warning. When a file had been assigned the wrong color space and it has not been converted to sRGB IEC61966-2.1, you will start to see discoloration. When an image is in the wrong color space they often appear muted, dark, and sometimes with a green hue.
Read more about Color Space in our help article.
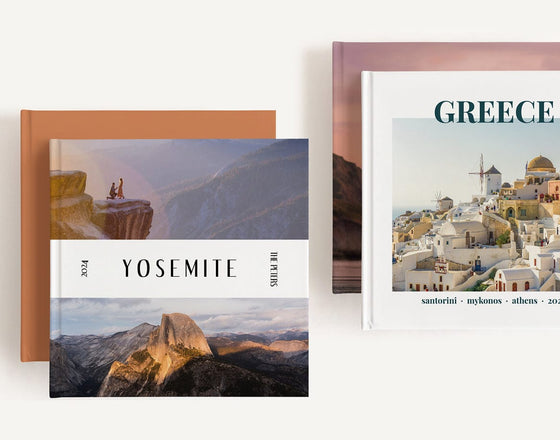
3. Select the perfect Photo Book.
Once you have an idea of how many photos you’d like to add to your Photo Book, and they’re all ready to go, you can choose which one is going to work best for you. We’ve got many gorgeous designs to get you started, so take your time finding the perfect one! You can also start from scratch with our Hardcover Photo Book or Lay Flat Photo Book.
Choose your size.
Our Photo Book sizes range from 5x7 to 12x12, so you can choose which size is going to be right for the occasion. Gifting a Graduation Photo Book? Your grads might want something on the more portable side to bring with them to college. Creating a Travel Photo Book for your coffee table? Go big so you can fit as many high quality photos from your travels to look back on for years to come.
Choose your cover & color.
If you’re creating a Hardcover or Lay Flat Photo Book from scratch, choose from Leather, Cloth or Lustre Photo - there’s a Photo Book cover & color that’s perfect for any aesthetic you're going for.
Choose your paper type.
Fill your Photo Book with Linen, Pearl, or Semi-Gloss pages. Each Photo Book has a minimum of 10 pages, but you can add up to 60 when editing!
3. Select the perfect Photo Book.
Once you have an idea of how many photos you’d like to add to your Album, and they’re all ready to go, you can choose which album is going to work best for you.

Choose your size.
Our album sizes range from 8x8 to 12x12, so you can choose which size is going to be right for the occasion. Gifting a Senior Album? Your grads might want something on the more portable side to bring with them to college. Creating your Wedding Album? Go big so you can fit as many high quality photos from your big day to look back on for years to come.
Choose your cover.
Leather, Canvas, Linen, or a Photo Wrap - there’s an album cover that’s perfect for any aesthetic you want to go for.
Choose your page thickness & spread count.
Our spread count ranges from 10 to 40, so you have multiple options to choose from depending on how many photos you’d like to display. For maximus spread counts, opt for thin pages, which can accommodate 50 spreads. If you’re looking for a heftier page and are not as concerned about spread count, choose thick pages.
Paper Type Comparison

Semi-Gloss

Linen
Not available for Lay-flat Photo Books

Pearl
Not available for Lay-flat Photo Books
4. Design & Order your Photo Book.
Now that you are ready to order your Photo Book, let’s walk through the next steps to design and order it. There are a few ways to do this!
On our website, we have made it simple to order your Photo Book. This option is easy for anyone to use, especially if you have never ordered with us before. You just need to make sure the photos you want to upload are on your computer and easily accessible.
On our website, we have made it simple to order your Photo Book. This option is easy for anyone to use, especially if you have never ordered with us before. You just need to make sure the photos you want to upload are on your computer and easily accessible.
- To begin ordering your Photo Book, log into your Nations Photo Lab account.
- After choosing your size, cover type and color, and paper type, click CUSTOMIZE NOW.
- Choose a theme for your Photo Book or create your own.
-
Click ‘Photos at the top of the toolbar on the left — there you can upload photos from your computer or click into the gallery of photos you’ve already uploaded or upload new photos.
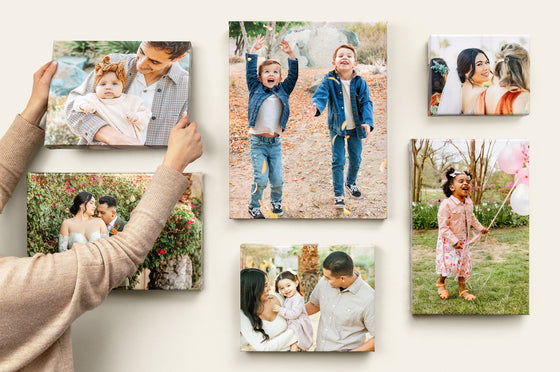
- Arrange your photos within your page spreads exactly how you like them. You can also change your layouts on each page, add text, add gloss UV coating, or add foil and embossing on the cover in this step. See the video above for more designing tips and tricks!
-
Once everything is exactly how you’d like it, and you’ve reviewed your project, click ADD TO CART and start your checkout process!
You can upload photos to your Nations Photo Lab account before you order your prints, as well, and keep your photos in galleries!
Design Tip:
When designing your Photo Book, please be sure all important content is located within the safe zone. Click here for more helpful design tips and templates.
When designing your Photo Book, please be sure all important content is located within the safe zone. Click here for more helpful design tips and templates.
4. Design & Order your Photo Book.
Now that you are ready to order your Photo Book, let’s walk through the next steps to design and order it. There’s a few ways to do this!
On our website, we have made it simple to order your Photo Book. This option is easy for anyone to use, especially if you have never ordered with us before. You just need to make sure the photos you want to upload are on your computer and easily accessible.
On our website, we have made it simple to order your Photo Book. This option is easy for anyone to use, especially if you have never ordered with us before. You just need to make sure the photos you want to upload are on your computer and easily accessible.
1.
To begin ordering your Photo Book, log into your Nations Photo Lab account.
2.
After choosing your size, cover type and color, and paper type, click CUSTOMIZE NOW.
3.
Choose a theme for your Photo Book or create your own.
4.
Click CHOOSE PHOTOS at the top of the toolbar on the left — there you can upload photos from your computer or click into the gallery of photos you’ve already uploaded and choose your photos.
“You can upload photos to your Nations Photo Lab account before you order your prints, as well, and keep your photos in galleries!”
5.
Arrange your photos within your page spreads exactly how you like them. You can also change your layouts on each page, add text, add gloss UV coating, or add foil and embossing on the cover in this step. See the video above for more designing tips and tricks!
Design Tip:
When designing your Photo Book, please be sure all important content is located within the safe zone. CLICK HERE for more helpful design tips and templates.
When designing your Photo Book, please be sure all important content is located within the safe zone. CLICK HERE for more helpful design tips and templates.
6.
Once everything is exactly how you’d like it, and you’ve reviewed your project, click ADD TO CART and start your checkout process!
Ordering has never been easier!
We off Apple Pay, PayPal and Shop Pay for checking out with ease.
Ordering has never been easier!
We off Apple Pay, PayPal and Shop Pay
for checking out with ease.
for checking out with ease.
Using ROES to order a Photo Book
ROES stands for REMOTE ORDER ENTRY SYSTEM and is a Java-based downloadable software that runs on your computer and is completely separate from the web-based ordering system. You download it once and it stays put on your desktop for whenever you need to use it! You simply choose a folder of images and start selecting from our product options.
ROES is best used for professional photographers who have all of their photos on their desktop and would prefer to upload that way rather than having to upload to the website first.
It’s just as simple to use as our website, but looks a little different, so let’s walk through how to order a Photo Book with ROES.
- First, you will need to download ROES, making sure you have already downloaded JAVA first.
- Sign in with your account number/customer ID and password. Your account number/customer ID can be found in on our website under MY ACCOUNT.
- Click ORDER PRODUCTS in the upper right corner of the ROES window.
- Next, select your catalog by clicking the SELECT PHOTO BOOK tab in the upper left corner of the ROES window.
- Choose a book size from the tab on the top left. In the window below, select your desired binding style and paper type: Classic Semi-Gloss, Classic Linen, Class Pearl, or Lay Flat Semi-Gloss.
- In OPTIONS on the right, select your Photo Book Cover Material, any embossing text you would like and whether you would like UV coating. If you chose a photo cover, drag and drop your image into the cover template in the center window.
- Click the ADD IMAGES button on the lower left-hand corner to open the folder that contains your images. Please advise, ROES does open by folder. Or, you can add your files by simply dragging and dropping your image from your computer into the bottom section of ROES.
- Toggle the black arrows in the center, below your Photo Book preview, to begin adding your images to your spreads. Page templates are located above the preview. Drag and drop a template of your choosing into the spread, then drag and drop your images into the template.
- When you’re all finished, click the ADD TO CART button, and you’re ready to checkout!
Using ROES to order a Photo Book
ROES stands for REMOTE ORDER ENTRY SYSTEM and is a Java-based downloadable software that runs on your computer and is completely separate from the web-based ordering system. You download it once and it stays put on your desktop for whenever you need to use it! You simply choose a folder of images and start selecting from our product options.
ROES is best used for professional photographers who have all of their photos on their desktop and would prefer to upload that way rather than having to upload to the website first.
It’s just as simple to use as our website, but looks a little different, so let’s walk through how to order a Photo Book with ROES.
ROES is best used for professional photographers who have all of their photos on their desktop and would prefer to upload that way rather than having to upload to the website first.
It’s just as simple to use as our website, but looks a little different, so let’s walk through how to order a Photo Book with ROES.
1.
2.
Sign in with your account number/customer ID and password. Your account number/customer ID can be found in your account on the website under MY ACCOUNT.
3.
Click ORDER PRODUCTS in the upper right corner of the ROES window.
4.
Next, select your catalog by clicking the SELECT PHOTO BOOK tab in the upper left corner of the ROES window.
5.
Choose a book size from the tab on the top left. In the window below, select your desired binding style and paper type: Classic Semi-Gloss, Classic Linen, Class Pearl, or Lay Flat Semi-Gloss.
6.
In OPTIONS on the right, select your Photo Book Cover Material, any embossing text you would like and whether you would like UV coating. If you chose a photo cover, drag and drop your image into the cover template in the center window.
7.
Click the ADD IMAGES button on the lower left-hand corner to open the folder that contains your images. Please advise, ROES does open by folder. Or, you can add your files by simply dragging and dropping your image from your computer into the bottom section of ROES.
8.
Toggle the black arrows in the center, below your Photo Book preview, to begin adding your images to your spreads. Page templates are located above the preview. Drag and drop a template of your choosing into the spread, then drag and drop your images into the template.
9.
When you’re all finished, click the ADD TO CART button, and you’re ready to checkout!
A few more reasons why ROES is a great option:
- Easy for ordering large volumes as you have the ability to mass upload
- No uploading of galleries. You work off folders organized on your desktop. The uploading occurs after you are done editing your order!
- No file size limit
- Easy to use crop tools
- Option to schedule orders to send at a certain time
- Option to keep old orders within the system for different amounts of time
A few more reasons why ROES
is a great option:
is a great option:
Easy for ordering large volumes as you have the ability to mass upload.
No uploading of galleries. You work off folders organized on your desktop. The uploading occurs after you are done editing your order!
No file size limit
Easy to use crop tools
Option to schedule orders to send at a certain time
Option to keep old orders within the system for different amounts of time
Enjoy your Photo Book.
Congrats! You’ve taken the time to save your cherished memories in an archival Photo Book. We hope you found our guide to ordering your book helpful and comprehensive. If you run into any issues or need some additional help, check out our help desk or reach out to one of our amazing customer support team members.
Enjoy your Photo Book.
Congrats! You’ve taken the time to save your cherished memories in an archival Photo Album. We hope you found our guide to ordering your album helpful and comprehensive. If you run into any issues or need some additional help, check out ourhelp desk or reach out to one of our amazing customer support team members.