Guest post from NPL Featured Photographers Chris & Allie Bartelski from The Reason Photography
There’s a phrase in French cooking - Mise en Place - which means putting things in their place. Take all the ingredients and prep them before you start cooking. The benefit here is that everything will be easily accessible and your work station will be a lot less messy when you are done.
Think about it. Have you ever started cooking a meal and then realized you needed a missing ingredient, only to send your spouse on an urgent mission for said ingredient? Grabbing tools and ingredients on the fly leaves my kitchen in a complete mess. Taking the extra time up front to organize tools and ingredients before starting to cook dramatically increases the joy of cooking, while also decreasing the time it takes to actually cook.
The investment of extra time up front pays off in the end, and it speeds up the total time it took to complete the meal.
Editing photos is no different.
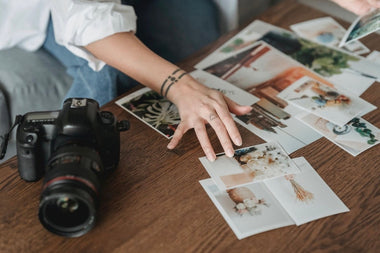
The greatest way to speed up your editing is to spend more time sorting your photos. Mise en place.
Getting all your photos sorted and organized before editing solves at least 5 basic hurdles every photographer faces with editing:
1. Helps manage large backups
2. Decreases editing time
3. Motivates you to finish
4. Improves your storytelling and album design
5. Helps you sleep at night
I’ll walk through the steps we take in our sorting of images and how these steps will improve your photography:
Step 1:
Within 24 hours of the event/shoot, download all images from all memory cards to a folder labeled as you normally would. It would be best if this hard drive was either automatically backed up to another drive (or at least to a RAID, which is a setup with two hard drives that act as one, creating an automatic duplicate).
Don’t reformat/delete memory cards. If you are paranoid like us, put them in a different location than your hard drive.

Step 2.
Sleep well, knowing that your images are as safe as they can be. Remember, they don’t exist unless they exist in three places.
Step 3.
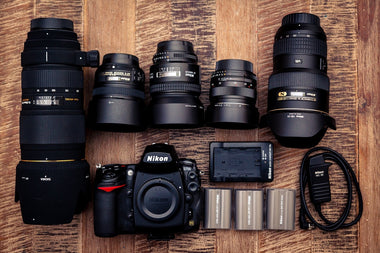
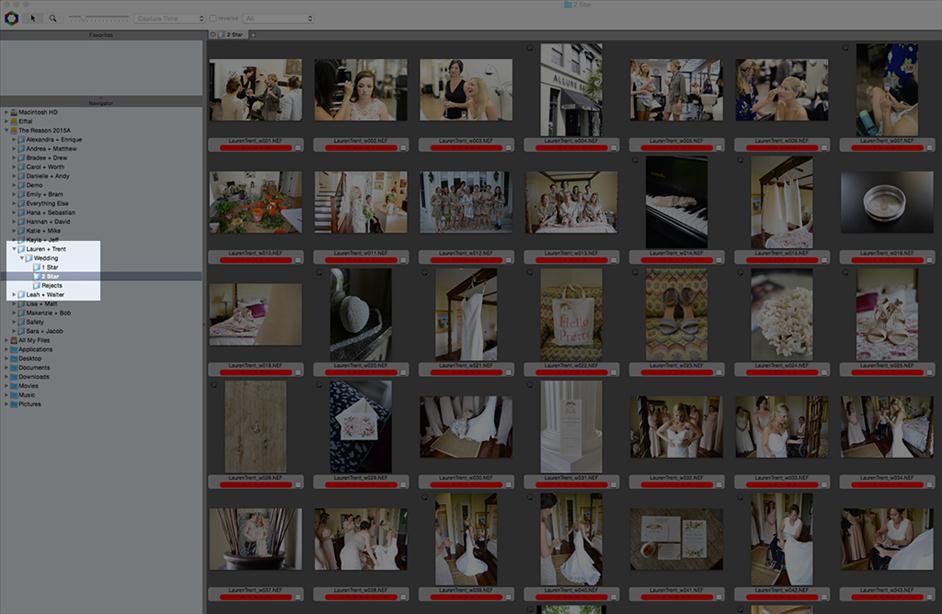
Load all the images into a culling (sorting program) like Photomechanic. This program should not be your editor (Lightroom etc.). You do not want to load all the images from your shoot into your editor all at once. Not only does this slow you down, but as your computer will have trouble processing that many files it will give you the opportunity to second guess.
In the first step of culling, all you want to do is to act on instinct. Give your images either a “No” or a “Maybe”. “No” means you would never want to show or edit this image. This includes blurry pictures, misfires, blinkers, or any from a series of photos that just aren’t as good as the others. With most of our weddings, we start with 4000 images shot, and through this first cull we end up with about 1000. Basically cutting it to 25%.

All these sorting actions are made on instant judgements Give yourself no room to think about whether you should keep it or not. If you need to think about it, keep it. The easiest way to label each file in Photomechanic is to press the “1” key to flag it as a 1 star file. Move all the 1 Star files to a folder called “1 Star”. Move all the reject files to a folder called “Rejects”. Don’t delete the reject files yet, but you do want them out of sight and out of mind.

If you have 2 or more people working in your photography business, consider having someone else do this cull than yourself. In our case, Allie does this cull. During this step, it’s also good to double check that you have all the images you expected to have. By that I mean…did you download all of your cards, or is part of the day/shoot missing?
Step 4.
Like I said in the previous step, hopefully someone else did the "1 star" culling. Now it's time to open up the 1 star folder. This time, instead of asking yourself “no” or “maybe”, now you want to ask, "Is it a yes?"
"Yes" files should be the keepers. Also, as you are picking keepers from the 1 star folder, you’ll be able to get a jump on picking the right images for the album design. Often finding the right images to use in a album among 4000 is overwhelming, but finding the right images among 1000 is much more manageable.
This step of culling is where you really can be picky. Even though you are going through four times less files, this step can take just as long. Our goal at this stage is to cut the 1 Stars in half, to end up with around 500 from the original 4000. Label the “yes” images with a 2 and move all 2 star labeled files into a new folder called “2 Star”.
Step 5.
Take all the "2 star" files and import them into your editor. Staring at 500 awesome keeper files instead of an overwhelming 4000 is not only going to be easier to manage, it also stops you from second guessing your decisions. Nothing slows down editing more than second guessing. Your first impression is the right one.
Remember that in our culture, people take about as long as an Instagram scroll to look at pictures. You have to be able to decide quickly which are your best images.
Once the images are loaded into your editor, you are staring at around 500 files, which is still a huge task. I like to break this down even further by creating folders or albums within the editor to sort the images by event. For a wedding we use these 8 categories - “Getting Ready,” “Details,” “Ceremony,” “Reception,” “Groom,” “Bride,” “Family / Wedding Party,” and “Mr + Mrs.”

Often, when you photograph, you might take a few detail shots, then take a picture of the bride with her mom, and then get some makeup pictures. The order always changes. Editing chronologically means every other photo might be in a different lighting condition, so separating the shots into sub-event/category will place all like images together. This allows for quicker and better editing by applying a setting over all "like" images, and then adjusting each image individually (instead of editing each image from scratch).
Another huge benefit from sorting your keeper (2 star) images into subcategories is that it breaks the 500 images down into manageable parts. My least favorite part to edit is usually the family photos, and then the reception. So I usually start by editing those.
The category I love to edit most is the “Mr & Mrs,” so I save that for last to keep me motivated. If I edit those first, I’ll dread the rest of the editing process, because in the back of my mind, I know that I still have to edit those boring family pictures.


So a typical editing session for me might look like this:
Mr + Mrs = 60 images
Bride = 65 (these also contain the bridesmaid pictures)
Groom = 45 (these also contain the groomsmen pictures)
Details = 60
Ceremony = 75
Getting Ready = 30
Reception = 125
Family / Wedding Party = 40
Total = 500
Let's really forget about conceptualizing a collection of 500 images. Let’s now start looking at it as 8 small sessions. It’s much easier to get yourself to start and complete a 40-image session than sitting yourself down to start a 500 image session.
Now, here’s how I reward/motivate/manage-a-photography-editing-task-with-young-kids-running-around:
I put the kids on the school bus and before I allow myself to drink a cup of coffee, I finish the “Family / Wedding Party” category. I now pat myself on the back, enjoy the coffee, and then jump into the biggest one - the Reception.

Once I complete that, I take a break and maybe start the laundry. Then I tackle the “Getting Ready” images, and take another break to check email. You get the basic idea now. It’s always better to break big tasks into small manageable ones, and before you know it you’ll be done!
Step 6.
Another reason why sorting your images into “Rejects,” “1 Star,” and “2 Star” folders is that it makes the backing up of RAW images much easier to do. Let’s face it: Hard drive space is cheap, but backing up 4000 RAW images is still kind of a burden.

I only keep the RAW images of anything in the “1 Star” or “2 Star” folder. I only edit and deliver images from the “2 Star” folder. I keep the “1 Star” for the “just in case” situation. Under no circumstances would I ever give a client anything out of the “Rejects” folder, but I do like to back those up as well.
Instead of keeping the 3000+ reject RAW files on my computer, I export them out of Photomechanic as a simple JPEG file. I keep the “Reject JPEGs” and delete the “Reject RAW” files. Now you have narrowed down your images to a more manageable total file size, which you can easily back up on other hard drives and online.